Member Sbobet, pada halaman ini kalian akan mendapatkan informasi mengenai LiveStreaming dan LiveChat, dimana kedua fitur yang berada di dalam situs agan resmi judi bola Sbobet online bisa di nikmati secara gratis untuk seluruh bettor yang sudah mendaftarkan diri menjadi anggota member dari website agen Sbobet kami ini.
Live Streaming Sbobet Pilihan Terbaik Dalam Berjudi
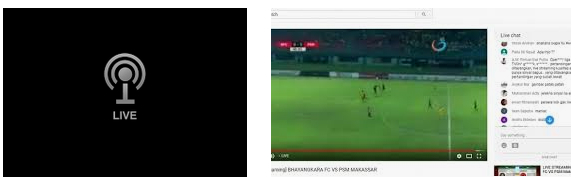
Layanan Live Streaming pada website agen resmi judi sbobet online kami melingkupi berbagai macam bursa judi online. Anda sebagai bettor bisa menikmati streaming ini pada produk judi casino online dan judi bola online.
Live Streaming juga bisa di nikmati oleh seluruh member Sbobet dengan menggunakan Sbobet Mobile. Tanpa harus menggunakan komputer atau laptop anda bisa memantau jalannya sebuah pertandingan secara lengkap dari berbagai macam liga sepakbola bagi bettor yang bermain taruhan judi bola online di agen resmi Sbobet ini.
Live Chat Sbobet Layanan Paling Bermutu Bagi Bettor

Selamat datang kembali di artikel saya kali ini. Sekarang sudah hampir masuk di penghujung tahun, pertanyaan saya untuk kalian semua, sudah berapa banyak yang bisa kalian dapatkan dari hasil perjudian daring selama ini? Apakah hasilnya bisa membuat anda berlibur ke luar negeri pada akhir tahun ini? Saya yakin pasti jawabannya tidak semua orang bisa merasakan kebahagiaan dari hasil perjudian bola yang dimainkan. Tapi ingatlah setiap perjudian pasti akan memberikan dampak baik untuk pemasukan anda sekalian. Meskipun besarannya sangat relatif karena setiap orang memiliki keberuntungan berbeda – beda, jangan lupa ada bonus menarik untuk member baru, dan cashback 7% bagi mereka yang bermain di atas 500 juta di bandar judi bola terpercaya SBOBET.
Apabila kalian saat ini masih belum bisa meraih hasil sesuai harapan tidak perlu merasa putus asa atau merasa ingin menyudahi bermain judi online. Disini saya ingin memberikan sedikit tips mengenai cara mendapatkan panduan terbaik agar bermain judi online menjadi lebih mengasikan, menghibur dan tentunya bisa menjadi pemasukan besar ke rekeing tabungan anda di luar gaji anda sebagai karyawan swasta di kantoran.
Adapun cara maupun tips yang akan saya berikan ini adalah bersifat umum namun memiliki efek yang sangat bagus dalam mencari strategi bermain taruhan judi online. Tips pertama yang harus kalian lakukan adalah, cobalah untuk memafaatkan layanan fitur yang ada di media judi tersebut. Misalnya anda menggunakan Sbobet online sebagai medianya maka disini saya menganjurkan kepada setia bettor agar menggunakan layanan Live Chat Sbobet untuk meminta bantuan mengenai panduan cara bermain judi online Sbobet.
Masih banyak bettor yang belum tahu kalau layanan live chat sbobet sebenarnya bisa dimanfaatkan untuk mendapakan panduan resmi dari pihak Sbobet itu sendiri. Ini adalah sebuah keuntungan terbaik yang bisa kalian lakukan karena bisa mendapatkan panduan yang dipandu langsung oleh admin mereka sendiri. Jangan sia – siakan kesempatan untuk bertanya mengenai panduan tersebut kepada live chat.
Apakah Live Chat Sbobet Merespon Cepat?
Kalian perlu tahu bahwa bettor yang ingin menanyakan apapun itu perihal perjudian daring silahkan tanyakan langsung melalui live chat Sbobet. Setiap pertanyaan yang masuk ke admin live chat akan selalu di respon secepat mungkin. Selain itu layanan ini juga bekerja atau online selama satu minggu penuh 24 jam sehingga anda bisa kapanpun menghubungi admin mereka.
Apa Saja Yang Biasa di Tanyakan Ke Live Chat Sbobet?
Ada banyak sekali pertanyaan yang masuk melalui live chat tapi dengan sigap, cepat dan cekatan setiap pertanyaan dijawab secara baik serta professional oleh admin. Adanya live chat ini memberikan bukti bahwa Sbobet sebenarnya sangat memperhatikan dan peduli kepada seluruh bettor hanya saja masih banyak penjudi yang belum sadar akan hal ini.
Pertanyaan umum yang paling sering ditanyakan oleh bettor yang belum terdaftar menjadi member adalah mereka menanyakan prihal bagaimana cara mendaftar di situs judi online Sbobet dan beberpa pertanyaan lainnya seperti mengenai bonus judi online sbobet, judi bola online di agen resmi sbobet online dan syarat ketentuan cara mengikuti promo referral sbobet online.
Sebelum mengakhiri artikel ini, saya ingin mengingatkan sekali lagi kepada para pembaca disini bahwa sebaiknya sebelum kalian mencari panduan terbaik bermain taruhan pada pasaran judi online, carilah terlebih dahulu melalui fitur layanan yang sudah disediakan oleh pihak mereka sendiri seperti Sbobet online. Jadilah bettor cerdas dengan bermain sesuai aturan dan trik terbaik agar mendapatkan kemenangan di setiap harinya.